Push-Ups 101

Remember in gym class when your PE teacher would tell you to drop and give him 20? I remember it all too well, and trust me, I did plenty of them.
I also remember there were a lot of students who couldn't do a push-up, so they had to do crunches instead. It's not surprising that many folks can't do a push-up, because push-ups are hard!
The way the fitness industry talks about push-ups makes it sound as if everyone can do them. But this is certainly not the case. It takes a lot of strength to do even a single push-up.
If you can't yet do a push-up, I'm going to show you how with this simple push-up progression program.
Here's how it works…
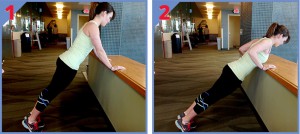
- Start by doing incline push-ups on a bench that is about waist height. Align your back far enough that you touch the bench (or half-wall as pictured) to the bottom part of your chest. Be sure to keep your body rigid. This will ensure that your chest, arms and shoulders are doing all the work. Once you can complete 3 sets of 15 reps you're ready to progress.
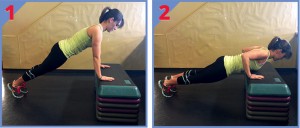
- For the next set, the bench should be at knee height. Make sure that your feet are aligned so the bottom of your chest touches the bench and keep your body rigid. Once you can complete 4 sets of 15 reps, you are ready to take on the real deal!
- Once you've reached this stage, it may take a great deal of effort to complete even one push-up. Be sure to stay on your toes, keep your body rigid and aim for the chest to hit the ground (even though it may not touch). Once your elbows are at 90 degrees, push yourself back up to the starting position and voila! You've completed a push-up. Now go brag to your friends!

It may take some time to get to the full push-up, but that's OK. Have patience and don't move on to the next progression until you can complete all sets and reps. You'll get there in no time!
You may also like
Push Up Workout Guide: The Best Push Up Exercises


